Monday 27 November 2017

Debugging your TTS mods with console++ : Watch List

This will be the final installment of the tutorial series about console++ which began here.

In this enthralling episode we'll look at the 'watch' command; a very useful debugging tool.  'watch' allows you to monitor a variable or object in your game (or even a function: more on that later), displaying a message in the chat window whenever it changes.

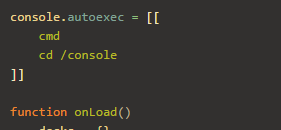
In order to use this feature of console++ you must call 'console.update()' in an 'onUpdate' event.  The example module already includes this command:


If you've followed this series so far then after firing up the example module in Tabletop Simulator you'll already be in command mode (thanks to console.autoexec);  type 'slow' to enable the card display.  Now if we type 'ls' a few times, waiting a short delay between each, we'll see the next_check variable increasing:


This is a pretty awful way to check its progress however; lets use 'watch' instead:
Type 'watch /next_check'.  Every two seconds the next_check variable will change and we'll see it do so.  This is because we currently have check_delay set to 2 seconds; type 'fast' to change check_delay to 0.2, and you'll see the variable change every 0.2 seconds instead.  Switch it back to 2 seconds with 'slow'.  You wouldn't want this running after the point where you get the info you want; it's filling the chat window.  To clear the watch list type 'watch -c'.  The '-c' parameter clears the watch list if it's used on its own.  You may instead supply it with a variable name to only clear that variable from the watch list: here we could have typed 'watch -c /next_check'.


We can also watch objects: type 'watch /dice/d6' then roll the dice.


You can see it will track the objects rotation and position.  This is fine for an object which you have used in your program, but not all objects will be stored in a variable.  Happily we can also track objects via their GUID; right click the chess rook and in the scripting menu click on its GUID to copy it to the clipboard.  Now type 'watch -g ' and hit ctrl-v  to paste in the rook's GUID.  Pick up the rook and move it around to see it being watched.

You can see what variables you are watching by typing 'watch' without any parameters:


You can also disable the watch list temporarily by pausing it with the '-p' parameter; this lets you stop the watch list outputting to the chat window without clearing it (and losing everything you are tracking).  Try it now: type 'watch -p' and move the rook around; no updates! Do it again to unpause (use up-arrow to fetch the previous command).

Grab the rook and move it around; the watch list really spams the chat window, since every tick the position changes.  In a lot of cases this will be too much information, so the watch command allows you to throttle its output for each given item.  Use the up-arrow key to fetch the command that added the rook to the watch list ('watch -g b27933', unless your GUID is different) and then add to the end of it '-t2'.  This will add a 2 second throttle to the watch.  Now drag the rook around and notice the difference.  Notice also that this command has replaced the previous version of the item in the watch list, overwriting the old, unthrottled item; each variable or object may generally only appear once in the watch list.


Now clear the watch list  with 'watch -c'.

As well as tracking variables and objects, we can also watch their member functions.  Type 'watch /dice/d6/getValue', and then roll the dice:


Clear the list, and then try to do the same for the dice's position with 'watch /dice/d6/getPosition'.  Argh, what's happening here?


What is happening is that every tick the watch list is calling the getPosition function of the dice, and every tick it is getting a new table.  Even though the table's member values are identical, the table itself is changing, so the watch list is outputting it each frame. This is definitely not useful!  We can mitigate this by using the '-/' parameter; this parameter specifies a member of the returned table to watch, instead of the table itself.  Type 'watch /dice/d6/getPosition -/x'; phew, the spam has stopped.   Move the dice around to see the 'x' value being tracked, then clear the watch list.


As well as variables and objects, we can also watch functions. To test this out we'll need one so let's see what functions we have available with 'ls -f'.  Ah: 'dice_total' is nice and simple as it has no parameters; lets watch it with 'watch /dice_total'.  Roll the dice to see the function changing.

We can also use functions with parameters; let's do that, but lets make things a little more complex, more like a situation you might find yourself in while actually debugging your mod.

What does the near function do?  Here is its source:


Not too complicated a function; it checks if two objects are near each other on the x and z axis.  We're going to use it to check when the rook is near the d4.

Our first problem is that we do not have a variable for the rook in our program; remember when we were watching it before we were doing so via its GUID.  That's not an option here: the near function does not take a GUID as a parameter, it takes two object variables.  Therefor the first thing we have to do is make one up for the rook.  We'll do so using the 'call' command: type 'call getObjectFromGUID 'b27933'', and then 'add /rook ~'.  (the '~' special variable holds the last result).


Now we have a variable holding our rook we can use it as a parameter to the near function; type 'watch /near /dice/d4 /rook', and then pick up the rook and move it around, over the d4 and away from it.


The near function is fairly simplistic, but I hope you can see how we can write debug functions in our code, and then hook them up to problematic objects during a play session, using them to work out what is going wrong with the mod.  More persistently, if you know you want to track certain variables or objects you can add 'watch' commands to your console.autoexec, giving you feedback on events which you want to know happen (but which don't necessarily throw error messages) every time you play your mod.

Thursday 23 November 2017

Debugging your TTS mods with console++ : Batching and Aliasing

This continues the series which started here.

The first thing we'll do in this session (after loading the example mod in TTS and loading it into Atom) is use console++'s autoexec feature: this allows you to set a series of commands which will be executed when your mod is loaded.  In order for this feature to work you need to call console.load() in your onLoad function; the example mod already does this as the last line:


With that line present all we need to do to make console++ execute a script on startup is set it in the console.autoexec variable.  Add this block of code above the onLoad function:


console.autoexec = [[
    cmd
    cd /console
]]


Hit Save And Play; now when we hit enter in TTS and type a command we don't need to prefix it with '>' and don't need to remember to switch to command mode - the 'cmd' command has already done that for us.  Type 'ls' to test this out:


You can see we are already in command mode (the command worked without a '>'), and are indeed inside the console table.

Now, the autoexec feature isn't groundbreaking: it's not doing anything we couldn't simply do with Lua commands.  Instead of making an autoexec script we could have written this code:


This accomplishes the same thing: sets you to command mode and changes your current location.  It was simpler to just type the console++ commands though, no?  Setting up the autoexec has an additional benefit; we can invoke it manually using the 'exec' command.  Type 'cd /' to return to the root table, then 'exec console/autoexec', then 'ls': you'll see we are back in the console table.  

Thus you can set up batches of instruction in strings in your program, and then run them with the 'exec' command; console.autoexec isn't special in this (it's only different because it is run automatically on loading) - any string variable can be executed.  

As with any command which takes a variable as an argument, we can make it work on a literal string too: thus we can use 'exec' to run a sequence of commands entered as one line.  To do this we need to know the use of these three punctuation marks in console++:
  • A string parameter prefixed with a back-tick (`) is treated as a literal (instead of a path)
  • Double- and single-quotes (" and ') can be used to surround a parameter containing spaces in order to stop the spaces delimiting the parameter.
  • The semi-colon (;) can be used to separate commands in a script instead of a new line.
So to duplicate the above autoexec script on a single line we type this:

exec "`cmd; cd /console"

The command line sees the surrounding double-quotes and treats everything inside them as one parameter. It then sees that that parameter starts with a back-tick and so knows it is a string literal, and then the 'exec' command splits that string up by its semi-colons.


We'll come back to 'exec' later; right now we're going to look at the 'alias' command.  'alias' allows you to create your own commands from any existing commands.  At its simplest this simply lets you rename commands to suit yourself: console++'s 'ls' and 'dir' commands are actually the same command: one is simply an alias of the other.  If you wanted to add your own name you can use 'alias' to do so.  Let's say you are especially verbose, and you want to type 'list' instead of 'ls': simply enter 'alias list ls'.

This is a pretty silly example; lets make it actually useful.  By default the 'ls' command only displays variables and tables - it does not display game objects or functions. To display everything in your current location you use the '-a' option: 'ls -a'.  Let's set up an alias for that: at the command prompt type 'cd /' to go to the root then 'alias list ls -a', and then 'list':


I typed 'ls' afterwards to compare the results: you can see our 'list' command displayed the functions as well as the rest, while 'ls' did not.  If you like this behaviour you can include this alias command in your autoexec to make it available whenever you run your mod.  You could even take it a step further, and alias the 'ls' command over the top of itself with 'alias ls ls -a', which would replace the default ls behaviour, allowing you to just type 'ls' to see everything (though a better alias for this would be 'alias ls ls -fov', as this will allow you to toggle them off again; '-a' overrides any other parameters)

You can check what a command does with the 'help' or '?' command (as with ls/dir, one of these is just an alias of the other). Type '? list' and you'll see:


Now we're going to combine these two commands, 'exec' and 'alias', to create some commands for controlling our mod.  Enter these commands:

alias slow exec -q "`set /update_cards true; set /check_delay 2.0"
alias fast exec -q "`set /update_cards true; set /check_delay 0.2"
alias off set /update_cards false

After entering these aliases we will have three new commands: 'slow', 'fast' and 'off'.  Typing 'slow' or 'fast' will enable the card display updating to match the dice total; one being more responsive than the other.  Typing 'off' will disable the card updating.  Try them out!

The '-q' (quiet) option tells the 'exec' command not to display the result of each command it is executing; just to display the final result.  If we used the '-s' (silent) option instead then the final result would also be suppressed.  Alternatively we could have used the '-v' (verbose) option to make 'exec' display all the commands it is executing as well as their results.  If you want to you can add your own custom output by using the 'echo' command, which prints its arguments in the chat window.

Note we don't need a back-tick before true and false - these are special cases.  If we were assigning a string we would need the back-tick, or it would try to look up the string as if it were a path.

These are nice, but no good if you have to type them in every time you open your mod in TTS.  That's OK though; we can add them to our autoexec!  Remove the 'cd /console' command and add them in like this:


Now whenever you load your mod you will start in command mode, and have these commands at your disposal.